PHP編程:針對多用戶實現頭像上傳功能PHP代碼 適用于登陸頁面制作
《PHP編程:針對多用戶實現頭像上傳功能PHP代碼 適用于登陸頁面制作》要點:
本文介紹了PHP編程:針對多用戶實現頭像上傳功能PHP代碼 適用于登陸頁面制作,希望對您有用。如果有疑問,可以聯系我們。
PHP實戰一個網站,其實說白了就是某幾個特定功能的組合,而更換用戶頭像就在這些功能之中.今天就來做個測試,針對不同的用戶,實現頭像上傳功能.
PHP實戰--------------------------------------------------------------------------------
PHP實戰成品圖
PHP實戰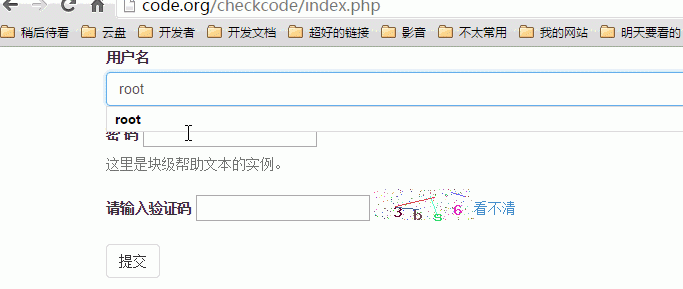
PHP實戰思路
??針對不同的用戶上傳頭像,我們要為每一個已登錄的用戶創建一個文件夾,文件夾的名稱以當前用戶的用戶名為準.
PHP實戰??用戶上傳成功后,跳轉到用戶登錄成功后的頁面,并刷新用戶頭像.
PHP實戰登陸頁面
PHP實戰表單制作
PHP實戰
<form role="form" action="./forindex.php">
 <div class="form-group">
 <label for="name">用戶名</label>
 <input type="text" class="form-control" id="username" name="username"
  placeholder="請輸入名稱">
 </div>
 <div class="form-group">
 <label for="inputfile">文件輸入</label>
 <input type="password" id="inputfile" name="password">
 <p class="help-block">這里是塊級幫助文本的實例.</p>
 </div>
 <div class="form-group">
 <label>請輸入驗證碼</label>
 <input type="text" id="checkcode" name="checkcode" />
 <img id="imagecheckcode" src="./store.php?r=<?php echo rand();?>" /><a href="void(0);" onclick="change()" >看不清</a>
 </div>
 <script>
 function change(){
  document.getElementById("imagecheckcode").src = "./store.php?r="+ Math.random();
 }
 </script>
 <button type="submit" class="btn btn-default">提交</button>
</form>
PHP實戰驗證碼制作
PHP實戰
<?php
session_start();// 必須在php的最開始部分聲明,來開啟session
// 使用gd的imagecreatetruecolor();創建一張背景圖
$image = imagecreatetruecolor(100,40);
// 生成填充色
$bgcolor = imagecolorallocate($image,255,255,255);
// 將填充色填充到背景圖上
imagefill($image,0,0,$bgcolor);
//////// 生成隨機4位字母以及數字混合的驗證碼
$checkcode='';
for($i=0;$i<4;$i++){
 $fontsize = rand(6,8);
 $fontcolor = imagecolorallocate($image,rand(0,255),rand(0,255),rand(0,255));
 // 為了避免用戶難于辨認,去掉了某些有歧義的字母和數字
 $rawstr = 'abcdefghjkmnopqrstuvwxyz23456789';
 $fontcontent = substr($rawstr,rand(0,strlen($rawstr)),1);
 // 拼接即將誕生的驗證碼
 $checkcode.=$fontcontent;
 // 避免生成的圖片重疊
 $x += 20;
 $y = rand(10,20);
 imagestring($image,$fontsize,$x,$y,$fontcontent,$fontcolor);
}
// 保存到session變量中
$_SESSION['checkcode']=$checkcode;
// 生成一些干擾的點,這里是200個
for($i=0;$i<200;$i++){
 $pointcolor = imagecolorallocate($image,rand(50,255),rand(50,255),rand(50,255));
 imagesetpixel($image,rand(0,100),rand(0,30),$pointcolor);
}
// 生成一些干擾線 這里是4個
for($i=0;$i<4;$i++){
 // 設置為淺色的線,防止喧賓奪主
 $linecolor = imagecolorallocate($image,rand(50,255),rand(50,255),rand(50,255));
 imageline($image,rand(0,99),rand(0,29),rand(0,99),rand(0,29),$linecolor);
}
header('content-type:image/png');
imagepng($image);
// 釋放資源,銷毀執行對象
imagedestroy($image);
PHP實戰JavaScript刷新驗證碼
PHP實戰
<a href="void(0);" onclick="change()" >看不清</a>
<script>
 function change(){
  document.getElementById("imagecheckcode").src = "./store.php?r="+ Math.random();
 }
</script>
PHP實戰驗證頁面
PHP實戰由于本次試驗最核心的是對用戶頭像的更換,所以用戶名我們暫且不管,以Root為準.
PHP實戰驗證邏輯
PHP實戰
<?php
 session_start();
 header("Content-Type:text/html;charset=utf-8");
 $username = $_REQUEST['username'];
 $password = $_REQUEST['password'];
 if(strtolower($_REQUEST['checkcode']==$_SESSION['checkcode'])){
 if(!is_dir($username)){
  mkdir($username);
 }
 echo "恭喜您,登陸成功!"."<br />3秒后將自動跳轉到個人主頁!";
 $_SESSION['username'] = $username;
 header("refresh:3;url=./personalpage.php");
 }else{
 echo "對不起,登陸失敗了!";
 header("refresh:3;url=./index.php");
 //echo "<script>window.location.href='./index.php'</script>";
 }
PHP實戰頁面跳轉
PHP實戰在PHP中,要先實現頁面的跳轉,有很多方式.本文使用了增加header信息的方式,下面介紹幾個關于頁面跳轉的小實例.
PHP實戰header函數
PHP實戰
< ?php
//重定向瀏覽器
header("Location: http://blog.csdn.net/marksinoberg");
//確保重定向后,后續代碼不會被執行
exit;
?>
PHP實戰注意:Location和:之間不能有空格?
PHP實戰Meta標簽
PHP實戰<?? meta?? http-equiv = "refresh"? content = "1;url=http://blog.csdn.net/marksinoberg" >
PHP實戰注意: content可以控制在幾秒之內完成跳轉.?
PHP實戰JavaScript
PHP實戰
< ?php
$ url = "http://bbs.lampbrother.net" ;
echo " < script language = 'javascript'
type = 'text/javascript' > ";
echo " window.location.href = '$url' ";
echo " < /script > ";
?>
PHP實戰注意: 使用JavaScript方式,代碼放置的位置可以隨意,只要是符合語法要求即可.?
PHP實戰上傳頁面
PHP實戰個人主頁
PHP實戰
<!DOCTYPE html PUBLIC "-//W3C//DTD XHTML 1.0 Transitional//EN" "http://www.w3.org/TR/xhtml1/DTD/xhtml1-transitional.dtd">
<html xmlns="http://www.w3.org/1999/xhtml">
<head>
<meta http-equiv="Content-Type" content="text/html; charset=utf-8" />
<title><?php session_start(); echo $_SESSION['username']."的個人主頁"; ?></title>
<style>
 img {
 width:128px;
 height:auto;
 }
</style>
</head>
<body>
<div>
 <img id="userphoto" src="./root/lover.png" /><br />
 <form action="./uploadphoto.php" method="post" enctype="multipart/form-data">
 <input type="file" name="photo" />
 <input type="submit" onclick="uploadphoto()" value="上傳新頭像"/>
 </form>
 <script>
 function uploadphoto(){
  document.getElementById("userphoto").src = "./root/<?php echo $_SESSION['username'];?>.png"
 }
 window.onload = function(){
  uploadphoto();
 }
 </script>
</div>
</body>
</html>
PHP實戰上傳核心
PHP實戰上傳的核心還是一個表單,我們把要進行上傳的圖片上傳到服務器,然后php使用move_uploaded_file來實現文件的遷移,實現上傳.
PHP實戰
<?php
 session_start();
 header("Content-Type:text/html;charset=utf-8");
// 附件的存儲位置、附件的名字
$path = "./root/";
$username = $_SESSION['username'];
// 拼接成該文件在服務器上的名稱
$server_name = $path.$username.".png";
if($_FILES['photo']['error']>0) {
 die("出錯了!".$_FILES['photo']['error']);
}
if(move_uploaded_file($_FILES['photo']['tmp_name'],$server_name)){
 //echo "<BR>"."Upload Success!";
 echo "恭喜您,上傳成功!"."<br />3秒后將自動跳轉到個人主頁!";
 header("refresh:3;url=./personalpage.php");
}else{
 //echo "<BR>"."Upload Failed!".$_FILES['photo']['error'];
 echo "對不起,上傳頭像失敗了!";
 header("refresh:2;url=./index.php");
}
?>
PHP實戰最終結果
PHP實戰登陸頁面
PHP實戰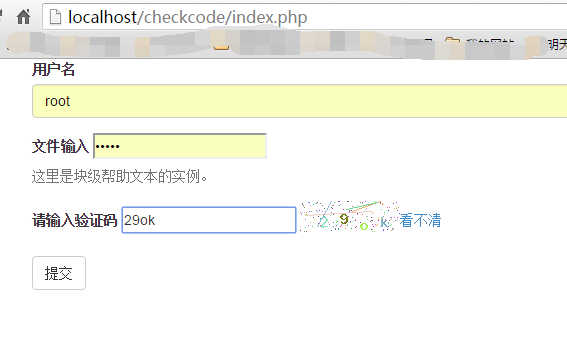
PHP實戰驗證結果
PHP實戰
PHP實戰個人主頁
PHP實戰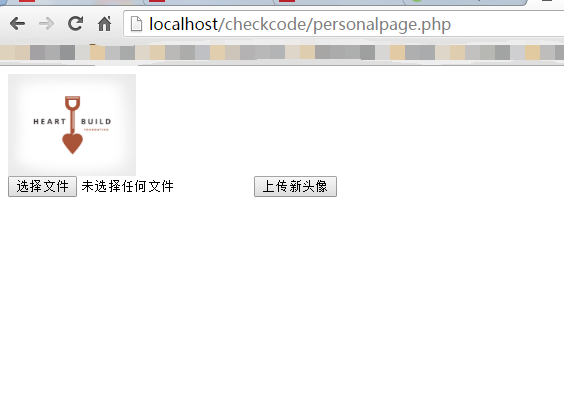
PHP實戰最新頭像
PHP實戰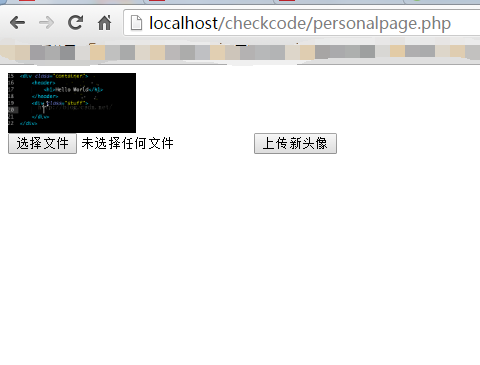
PHP實戰總結
PHP實戰回顧一下,本次試驗的收獲.
??session的開啟必須在php文件的開頭session_start()
??php可以實現的頁面跳轉的方式
??上傳文件
??驗證碼制作與使用
??JavaScript:void(0);的使用核心
PHP實戰大致的內容就是這么多,雖然沒有增加美化效果,但是麻雀雖小,五臟也算是俱全了.
PHP實戰以上就是本文的全部內容,希望對大家的學習有所幫助,也希望大家多多支持維易PHP.
同類教程排行
- PHP如何把圖片base64轉為buff
- qhQrCodeReader組件:PHP
- PHP用curl采集時,出現Recv f
- LINUX PHP7如何把curl擴展的
- PHP學習:利用PHP_XLSXWrit
- error 35: SSL connec
- NOTICE: PHP message:
- PHPStorm2017.1.1怎么去掉
- PHP集成環境phpstudy啟動時80
- php錯誤imagecreatefrom
- PHP錯誤imagecreatefrom
- 怎樣把phpstorm(或Intelli
- PHP7新增的NULL合并運算符??和?
- 防跨站提交和PHP偽造來源referer
- php保存圖片時報錯warning:im